Drywall Installation Services in North Bay
MHM General ContractingExpert Drywall Installation Services – Fast, Affordable, and Built to Last
At MHM General Contracting, we provide high-quality drywall installation for residential and commercial projects in North Bay, Ontario. Whether you’re building a new home, renovating an office, or upgrading interior walls, our expert drywall installation team delivers flawless, durable results every time.
From hanging drywall panels to precision taping, mudding, and finishing, we ensure your walls are smooth, seamless, and ready for paint or wallpaper.
Looking for “Drywall Installation Near Me”? Get Your Free Quote Today!
Skilled Craftsmanship – Smooth, professional finishes.
Fast & Efficient Service – No delays, no mess.
Exclusive savings – Save 5% with our Maintenance Membership!
The Best Choice
Why Choose MHM General Contracting for Drywall Installation?
Local Expertise
We understand North Bay’s construction standards and climate conditions.
Residential and Commercial Drywall Installation
Tailored solutions for homes, offices, and businesses.
Precision Craftsmanship
Flawless seams, perfect texture matching, and top-tier materials.
Superior Craftsmanship
Our skilled professionals ensure flawless installation & durability.
From new builds to renovations and drywall repairs, we provide professional drywall installation services that last!
Drywall SolutionsComplete Drywall Installation & Finishing Services
Residential Drywall Installation
- Custom Drywall Installation and Texturing – Achieve the perfect look for your home.
- Soundproof Drywall Installation Solutions – Reduce noise for quieter, more private spaces.
- Ceiling Drywall Installation – Flawless, seamless ceiling finishes.
Commercial Drywall Installation
- Expert New Construction Drywall Installation – Professional solutions for large-scale builds.
- Office & Retail Drywall Upgrades – Smooth, durable walls for business renovations.
- Fire-Rated & Soundproof Drywall Solutions – Compliance with commercial building codes.
Drywall Repair & Finishing
- Drywall Installation and Repair Specialists – From minor dents to full wall restoration.
- Fast and Efficient Drywall Hanging Services – We get the job done right, the first time.
- Quality Drywall Finishing and Taping – Expert seamless taping, mudding, and sanding.
Whether you’re renovating one room or completing a large-scale drywall project, our team ensures perfect results every time!
AffordableHow Much Does Drywall Installation Cost in Ontario?
The cost of drywall installation depends on factors like wall size, material selection, and complexity.
Estimated Drywall Installation Cost in Ontario:
- Basic Installation: $1.50 – $3.00 per sq. ft.
- Textured or Soundproof Drywall: $2.50 – $5.00 per sq. ft.
- Fire-Rated Drywall for Commercial Spaces: $3.50 – $6.00 per sq. ft.
We provide affordable drywall installation near you, ensuring top-quality results at competitive prices.
Proven Process
Our Drywall Repair Process
We follow a proven step-by-step process to guarantee flawless drywall installation:
1
Step 1: Free Consultation & Estimate
- We assess your project needs, space, and budget.
- Provide a detailed, upfront quote with no hidden fees.
2
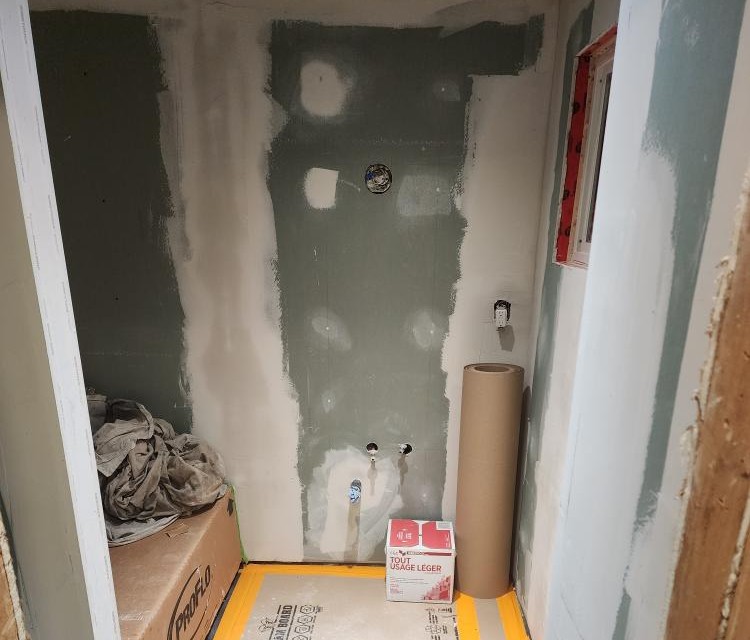
Step 2: Drywall Preparation
- Proper measuring, cutting, and framing adjustments for a perfect fit.
- Surface preparation to ensure durability and stability.
3
Step 3: Drywall Hanging
- Secure drywall panels using premium materials and techniques.
- Ensure all joints are tight and properly positioned.
4
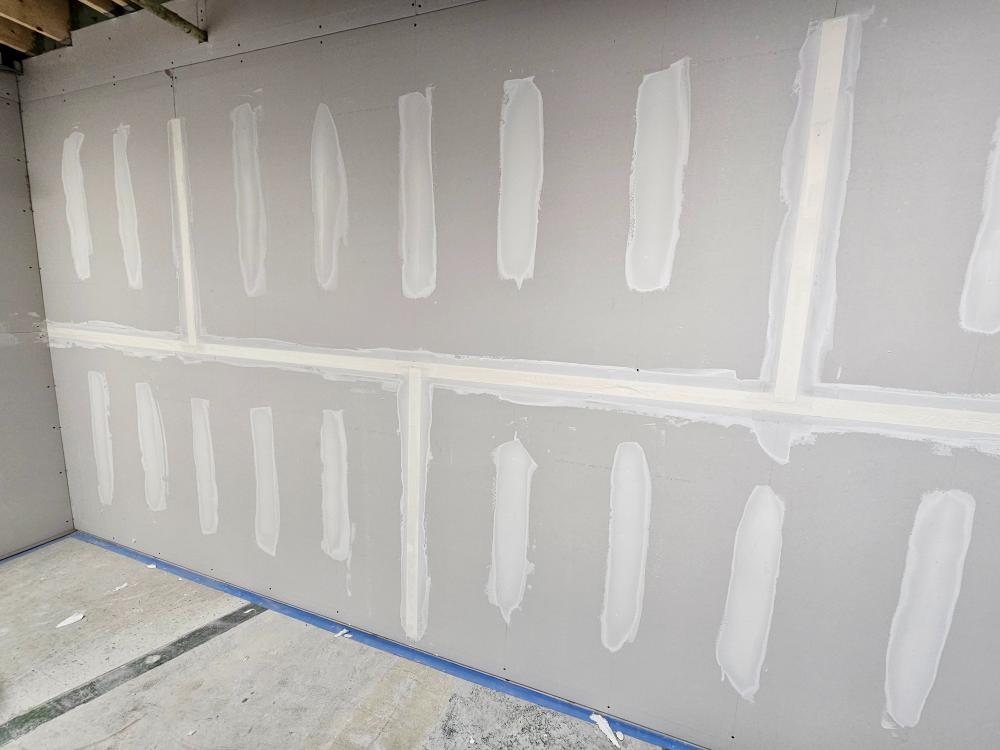
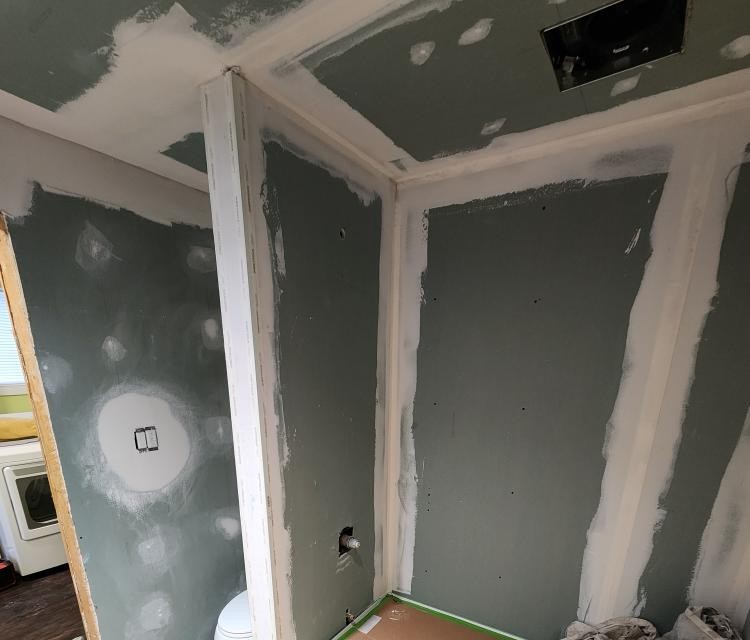
Step 4: Taping, Mudding & Finishing
- Expert drywall finishing and taping for smooth, seamless walls.
- Sanding and final touches for a perfect painting surface.
5
Step 5: Final Inspection & Clean-Up
- Conduct quality checks to ensure no imperfections.
- Leave your space clean, dust-free, and move-in ready.
With MHM General Contracting, you get a stress-free, professional drywall installation experience from start to finish!
Seamless ResultsOur Drywall Installation Projects
From perfectly finished residential walls to large-scale commercial drywall installations, we take pride in delivering seamless results.
Ready to upgrade your space? Contact us for a free consultation today!
What Our Clients Say – About Our Drywall Installation Services
See why homeowners and businesses trust us for top-quality drywall installation!
Build Your Dream
Ready to Install Your Drywall?
Get Your Free Drywall Installation Quote Today!
At MHM General Contracting, we are North Bay’s trusted drywall installation professionals. Whether you’re working on new construction, home renovations, or commercial projects, our team delivers expert drywall installation and finishing services that stand the test of time.
Call us:
(705) 303-3340
Visit us:
245 Mattawa Street Unit B, North Bay
Exclusive Offer:
Save 5% on your drywall installation!
Ask about our Maintenance Membership Program to enjoy exclusive savings!
FAQsYour Drywall Questions, Answered
1. How long does the drywall installation process typically take?
The duration of a drywall installation project can vary significantly depending on the size of the space, complexity of the job, and the experience of the installers. For a standard room (approximately 12×12 feet), the process might take 3-5 days from start to finish depending on ambient humidity. Here’s a general breakdown:
- Step 1. Preparation and hanging drywall sheets
- Step 2. Taping and applying the first coat of joint compound
- Step 3. Applying second and third coats of joint compound, sanding, and finishing
For larger projects or entire homes, the process can take anywhere from a week to several weeks. Factors that can affect the timeline include:
- The number of rooms or total square footage
- Ceiling height and any custom architectural features
- The need for any specialized drywall (e.g., moisture-resistant for bathrooms)
- Drying time between coats of joint compound, which can vary based on humidity and temperature
- The skill level of the installers
It’s important to note that rushing the process can lead to poor results. Allowing adequate drying time between coats and proper sanding is crucial for a smooth, professional finish.
2. What are the key steps involved in the drywall installation process?
The drywall installation process involves several critical steps to ensure a high-quality finish:
- Preparation: This includes measuring the space, calculating materials needed, and preparing the work area. Ensure all framing is complete and utilities are properly installed.
- Cutting and fitting: Measure and cut drywall sheets to fit the walls and ceilings, accounting for doors, windows, and other openings.
- Hanging: Attach the drywall sheets to the framing using screws or nails. Start with the ceiling, then move to the walls. Use a drywall lift for ceiling installation to ensure safety and precision4.
- Taping: Apply paper or mesh tape over the seams between drywall sheets to create a seamless surface.
- Mudding: Apply joint compound (also called “mud”) over the tape and screw heads. This typically involves three coats:
- First coat: Covers the tape and fills major gaps
- Second coat: Builds up the joint and feathers it out
- Third coat: Smooths and finishes the surface5
- Sanding: After each coat of mud dries, sand the surface to create a smooth finish. The final sanding is crucial for achieving a flawless look.
- Texturing (optional): Apply any desired texture to the walls or ceiling.
- Priming and painting: Once the installation is complete and the surface is smooth, prime and paint the drywall to finish the job.
Each step requires attention to detail and proper technique to ensure a professional-looking result.
3. Should I use screws or nails for drywall installation?
While both screws and nails can be used for drywall installation, screws are generally preferred by professionals for several reasons:
- Holding power: Screws have superior holding power compared to nails, reducing the likelihood of the drywall coming loose over time.
- Fewer pops: Screw heads are less likely to “pop” through the surface of the drywall as the house settles or temperature changes cause expansion and contraction.
- Easier removal: If repairs are needed later, screws are easier to remove without damaging the surrounding drywall.
- Better for ceilings: Screws provide a more secure hold for ceiling installations, where gravity constantly pulls on the drywall.
However, nails can still be used effectively in certain situations:
- For attaching drywall to wood framing in non-critical areas
- When speed is a priority, as nailing can be faster than screwing
- In areas with minimal vibration or movement
If you choose to use nails, opt for ring-shank nails, which have better holding power than smooth nails. Regardless of the fastener type, proper spacing is crucial:
- For walls: Space fasteners every 16 inches along the studs
- For ceilings: Space fasteners every 12 inches along the joists
Ultimately, while nails can be used, screws are the preferred choice for most professional drywall installers due to their superior performance and reliability.
4. How do I properly tape and mud drywall seams?
Taping and mudding drywall seams is a crucial step in achieving a smooth, seamless finish. Here’s a detailed guide to the process:
- Prepare the surface:
- Ensure all drywall sheets are securely fastened
- Check that screw heads are slightly recessed
- Remove any dust or debris from the seams
- Apply the tape:
- Use either paper tape or self-adhesive mesh tape
- For paper tape, apply a thin layer of joint compound along the seam first
- Center the tape over the seam and press it into the compound
- Remove any air bubbles or excess compound with a drywall knife
- First coat of mud:
- Apply a thin layer of joint compound over the tape
- Feather the edges of the compound to blend with the surrounding drywall
- Allow this coat to dry completely (usually 24 hours)
- Second coat:
- Once the first coat is dry, apply a wider, thinner coat of compound
- Extend this coat about 2 inches beyond the edges of the first coat
- Feather the edges smoothly
- Allow to dry completely
- Third (finish) coat:
- Apply a final, thin coat of compound, extending it even wider
- Feather the edges carefully to create a seamless transition
- This coat should be as smooth as possible
- Sanding:
- Once the final coat is completely dry, sand the area smooth
- Use a fine-grit sandpaper or sanding sponge
- Be careful not to sand through the compound to the tape
- Inspect and touch up:
- Check for any imperfections under good lighting
- Apply additional compound and sand as needed for a perfect finish
Remember, patience is key in this process. Rushing or applying thick coats can lead to cracking or visible seams. It’s better to apply multiple thin coats than fewer thick ones.
5. What are common issues that can arise during drywall installation and how can they be prevented?
Several issues can occur during drywall installation, but many can be prevented with proper techniques and attention to detail:
- Screw pops:
- Cause: Improper screw length or installation technique
- Prevention: Use the correct screw length and drive screws slightly below the surface without breaking the paper
- Use construction adhesive on the backs of drywall panels
- Visible seams:
- Cause: Poor taping and mudding technique
- Prevention: Use proper taping methods, apply multiple thin coats of joint compound, and sand carefully between coats
- Cracks along seams:
- Cause: House settling or improper installation
- Prevention: Use paper tape instead of mesh tape for better crack resistance, and ensure proper framing support
- Using construction adhesive may help reduce the likelihood of cracks occurring as it will help reduce overall movement
- Bubbles in the tape:
- Cause: Air trapped under the tape during application
- Prevention: Press tape firmly into the joint compound and remove excess compound
- Drywall compound too dry, Drywall paper tape achieves its bonding capabilities from proper saturation and subsequent evaporation. If the compound is too dry then the paper tape will not bond during the evaporation process and will the leave a air gap in behind during the next layer of compound (as it saturates the face of the tape)
- Uneven surfaces:
- Cause: Inconsistent mudding or sanding
- Prevention: Use a level and straight edge to check for flatness, and sand carefully for a smooth finish
- Moisture damage:
- Cause: Using regular drywall in high-moisture areas
- Prevention: Use moisture-resistant drywall in bathrooms, kitchens, and basements
- Sagging ceilings:
- Sagging ceilings can occur as a causation of various issues such as: water damage, insufficient fasteners, over spanning from fastening points, twisted of sagged framing members, poor drywall installation
- Corners cracking:
- Cause: Improper corner bead installation
- Prevention: Securely fasten corner beads and apply sufficient joint compound
- Use of Paper faced corners can help reduce the appearance/occurrence of cracks
- Alternatively, composite corners that are applied with adhesive also help reduce the occurrence of cracks thanks to the additional bond of the adhesive
- Nail holes showing through paint:
- Cause: Not properly covering fasteners with joint compound
- Prevention: Apply multiple thin coats of compound over fasteners and sand smooth
- Screw pops from improper screw depth (breaking the paper face of the drywall)
- Drywall gaps at the floor:
- Cause: Installing drywall flush with the floor
- Prevention: Leave a 1 1/2-inch gap between the drywall and the floor to allow for settling and prevent moisture wicking, a standard 3 1/2 baseboard will cover the gap, and it will allow for up to an inch and a half of standing water before beginning to damage drywall (in a flood situation)
By being aware of these potential issues and taking preventive measures, you can ensure a higher quality drywall installation that will look great and stand the test of time.